
Best Waterproofing Membrane For Showers
Best Waterproofing Membrane For Showers
Showers are the wettest spaces in commercial or residential buildings and need the very best waterproofing membrane solution available.
Before you start your waterproofing project, it is important to get an understanding from your local government requirements and AS3740 for waterproofing in wet areas prior to starting. The minimum requirements are as follows:
-
- Full floor within shower recess
- Minimum 100mm over hob and onto the bathroom floor
- Minimum 150mm up walls within shower recess
- The wall to wall junction(s) within shower up to a minimum height of 1800mm or 80mm above shower rose
- The full bathroom floor if it is made from timber, plywood or particleboard or if it is above ground floor or if it has a floor waste
For residential, once-off projects, the best solution is a “three-in-one” solution: primer, wet area tape and waterproofing membrane for the best waterproofing membrane for showers. Why best? Because it breaks down the steps into easy to follow instructions, allowing for waiting time between using each product, where it is required, for best results.
Step 1 – Primer
Trades people know the benefits of priming, but customers always ask – why prime?
Priming:
-
-
- controls the porosity of substrate
- consolidates residual dust – while you can take every effort to remove all contaminating materials such as dirt, oil, paint and any cured material, there is always residual
- offers better mechanical results, with most quality primers applicable on cement sheets, concrete, fibre cement, plasterboard, sheets and timber.
-
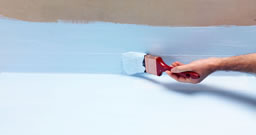
You can apply primer with a paint brush, or a broom for larger showers.
Drying time depends upon conditions, approximately 15-30 mins.
Watch this short video for an instant visual explanation summarising the above instruction (optional).
Step 2 – Wet Area Tape
Surface joints in showers can cause nasty leaks, so sealing them with wet area tape is the way to go. Use a good quality product so that you get a strong adhesive and good coverage over surface joints of the floor and wall, under shower grates and outlets.
Most quality tapes are applicable for use on wet area grade plasterboard in showers. Find a product that meets the recent standards for waterproofing according to the Australian Building Standards.
Watch this short video for an instant visual explanation summarising the above instruction (optional).
Step 3 – Waterproof membrane
The best waterproofing membranes for showers are those that meet Class III Membrane AS/NZ4858 and conform to AS3740-2010 Wet Area Membranes. These days, high performance water-based acrylic polyurethane waterproof membranes also meet the criteria, offering superior workability with high build to easily achieve the same thickness results.
How thick must the membrane be?
Always check with your local Council and AS3740 for specifications, for instance, you may be required to apply the waterproof membrane as 1mm thick on floors or 0.5mm thick on walls (after 2 coats – dry film thickness).
You can use a clean brush or roller to apply waterproof membrane in showers. Drying time between coats will vary according to the humidity, surface temperature and porosity of the substates.
Drying time between coats is between 2-4 hours at 23ºC in undertile applications. Tiling can begin once the second coat has thoroughly dried. Generally 2-3 hours at 23º, 50% relative humidity.
Watch this short video for an instant visual explanation summarising the above instruction (optional).
Always, ensure that you wear hand, eye, and face protection when applying waterproof membrane.
Once these considerations have been met, you can expect to receive a 10-year guarantee on the best waterproofing membrane for showers.
Visit the Dunlop Project Centre for more tips and products for trade applications.